Stamping out a Robotic Surgical Instrument
In 2012, Evans Tool & Die Shop Supervisor Dick Ankeny was tasked with building a die for one specific part of a robotic surgical instrument. The specifications for the part required tolerances to be within .005”. The part had to be made from stainless steel, because the part itself would actually be inserted into surgical patients’ bodies, as a piece of a robotic surgical instrument.
The Challenge of a Surgical Instrument
The manufacturer of the surgical instrument had created technical drawings for the part; however, we still had to evaluate the specifications to determine if the part could be made according to the customer’s drawings. After a few iterations, the engineers were ready to move to the tool makers to begin creating the die.
Dick Ankeny, a Toolmaker who has worked for Evans for 28 years, said this of the project: “The hardest part was creating such a small cylindrical shape from a flat piece of stainless steel to such fine tolerances.”
Stainless Steel
According to Ankeny, stainless steel is harder to work with, not as forgiving on tooling, harder to stamp, form, etc. But the surgical instrument had to be stainless steel, because the part would actually be inserted into the bodies of surgical patients. Similar to the materials used food utensils in restaurants, stainless steel is one of the most commonly used metal alloys in the manufacture of surgical implements.
Austenitic 316 steel is a type of stainless steel used often, and is referred to as “surgical steel”. This is because it is a tough metal that is very resistant to corrosion. Stainless steel can withstand temperatures as high as 400°C, meaning it can be sterilized easily in an autoclave at 180°C. Stainless steel also has the benefit of being almost as tough and hard-wearing as carbon steel.
The Tool & Die Building Process
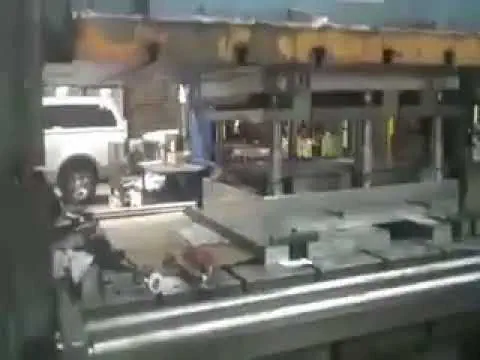
Once the drawings were finalized, we started building the tool. The process of making this die consisted of the following high-level steps:
- The Engineers draw the technical design (commonly called “prints”) for the surgical instrument.
- The Engineers determine which steel goes into each die, and then we order the steel for die. There are four different kinds of steel used in this particular die:
- A2 – basic tool steel – easy to machine, treat, and grind
- D2 – a step above A2, but a more durable steel
- CPM10V – very hard steel, high tensile strength
- M4 – also very hard steel, with high tensile strength
- The Toolmaker squares the steel, puts any drilled holes or tapped holes needed, mills in the required dimensions, leaving grind stock.
- What “leaving grind stock” means is that, for example, if the requirement for a certain size of block is 3” x 2” then we will actually mill the block to 3.020” x 2.020”.
- Then we put drilled and tapped holes on the block, and heat treat the block to harden it.
These steps sound relatively clear and simple; however, “It took us more than nine months to build this die”, said Ankeny.
Progressive Stamping the Part
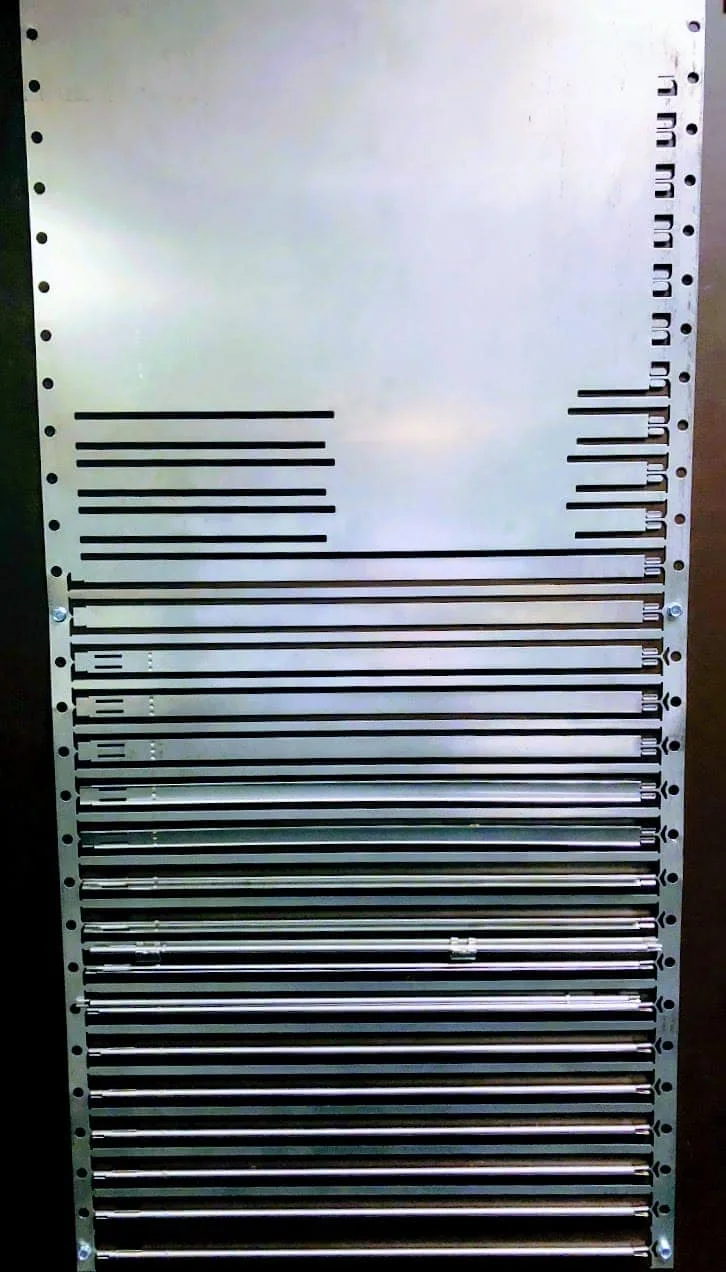
Ankeny described the progressive stamping process: “Each individual part starts with a single sheet of coiled stainless steel. We created 29 stamp progressions in the tool, starting with pilot holes. Each piece of flat steel moves forward at 20 strokes (hits) per minute, so we ended up producing just under 20 parts per minute once the metal stamp is rolling.” When creating this, it was important we used a high grade metal stamping lubricant.
Dick added, “This one was the second most challenging part I’ve ever built. We pulled that die out so many times I can’t remember!”
We built the die, ran many tests until the part met the final specifications and the customer was satisfied with the quality of the resulting part for their surgical instrument. Then our customer took the die and began manufacturing the part in their manufacturing facility.
“We can run the part or our customer can run the part. Either way is OK with us,” added Randall Stanfield, Engineering Project Director.
Testing & Measuring to Very High Tolerances
When the final part is rolled into its proper shape, we used a pin gauge to test it. One of the tests for quality was to drop a 3/16” pin straight through the cylinder. The specifications required tolerances of less than five thousandths of an inch (.005”), and the pin gauge had to move through the interior or the cylinder unimpeded. That’s just one test that the final part must pass. Some of the other challenging metrics included:
- Springback. When you bend steel, it naturally resists, and bends back slightly towards its original shape. Because of the exacting specifications of this part, we had to design and build the tool to keep springback to a minimum.
- Swedging. Swedging of the steel, to maintain the right thickness, was a challenge. We were required to change the steel to the required thickness (tolerances within .0005”) while having it maintain that exact thickness throughout the progressive stamping process while it’s running. Such requirements push the tooling to the limit of swedging the metal togethe
“Then we had to punch a tiny hole in it. Big challenge!” added Ankeny.
We used a Micrometer and pin gauges (3/16”) to measure the actual achieved tolerances and measurements. If the measurements don’t meet the specifications, we change radius of the tooling on the die. Then we complete another test run. There were close to 100 components in the die, including the top and bottom. In this case, “changing” the radius of the tooling on the die means adjustments of thousandths of inches.
Part of our core values
“Creating custom, difficult, challenging parts like this surgical instrument is a big part of our everyday operation,” adds Evans CEO Dee Barnes. “In the end, whether we produce the parts or our customer produces the parts, we know we’ve helped our customer get the end result they required.”
This entry was posted in Capabilities, Portfolio and tagged progressive metal stamping, surgical instrument, tool & die, toolmaking. Bookmark the permalink.


